How to reduce energy loss with a good inverter is not simply a matter of choosing the highest efficiency number on a product label. Real performance depends on load conditions, temperature, wiring, battery compatibility, and daily operating patterns. A unit rated at 98% efficiency may perform differently when installed in a dusty garage, exposed to heat, or operated far below its ideal power range.
Energy-efficiency expert Amory Lovins has often said, “The cheapest energy is the energy you don’t use.” His point applies directly to inverter selection. Avoiding unnecessary conversion, standby consumption, and heat loss can protect more usable energy before it reaches appliances or the grid. This guide introduces seven practical ways to improve system performance, including accurate sizing, efficient MPPT operation, short cable runs, proper ventilation, and regular monitoring.
Small details matter. A loose connection can create resistance and heat. An oversized inverter may waste energy during light loads. An undersized model may clip power during strong sunlight. These problems are easy to overlook.
No inverter is perfect.
Reliable decisions require more than marketing claims. Compare European or weighted efficiency, review independent test data, and examine warranty conditions. Installers should also measure voltage drop and operating temperature after commissioning. A useful system is not only efficient on paper; it performs steadily at noon, during cloudy weather, and through seasonal changes. Some recommendations may need adjustment because every roof, battery bank, and household load is different. That is where careful observation remains essential.
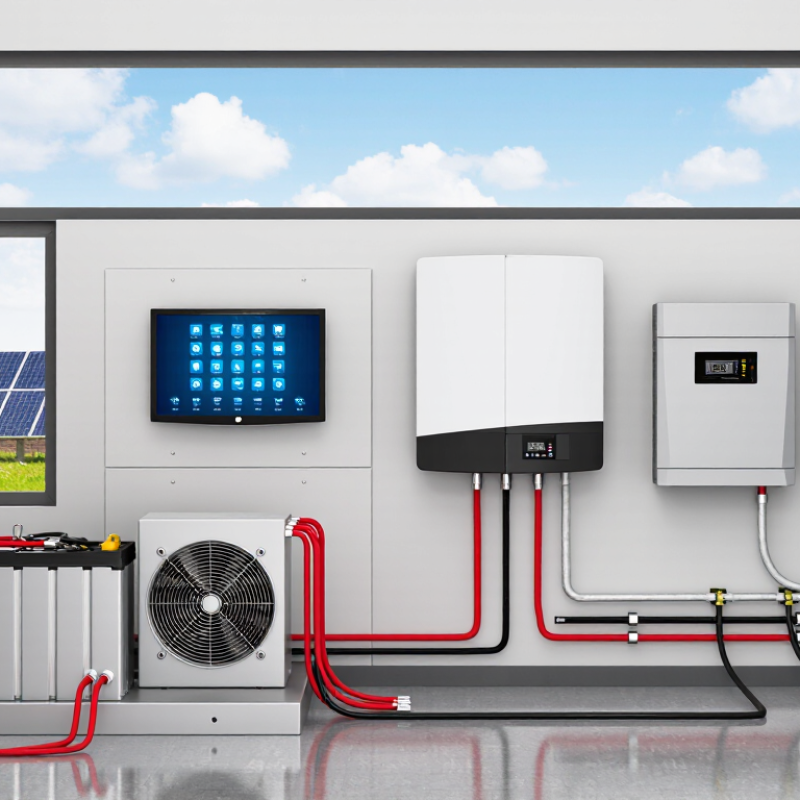
How Inverter Energy Loss Occurs in Solar and Power Systems
In a solar system, panels produce direct current, while most household appliances use alternating current. An inverter converts one into the other, and that conversion is never perfectly efficient. Some energy becomes heat inside electronic components. You can feel the result near an inverter’s ventilation slots on a sunny afternoon. Warmth is normal; excessive heat can signal poor airflow, heavy loading, or a fault.
Energy loss also occurs before and after conversion. Long or undersized cables create resistance, so a small share of power dissipates as heat. Low panel voltage, shading, and sudden changes in sunlight can keep an inverter away from its most efficient operating range. At night, some systems still draw a little power while waiting. Small losses add up. A well-sized inverter, clean connections, and clear space around cooling vents can help limit them. Still, there is no single adjustment that fixes every system; wiring layout and local conditions matter.
Check the inverter’s efficiency data under realistic operating conditions, not just its highest advertised figure. Compare its readings with the energy meter over several days, and note the time, weather, and load. If output drops unexpectedly, inspect for shading or blocked airflow before assuming the inverter is failing. I once overlooked a dusty vent during a quick check; it was a useful reminder that simple details count. A qualified technician can test wiring and settings when readings remain unusual.
Choose the Right Inverter Size and Conversion Efficiency
Choosing the right inverter size can prevent energy loss before installation begins. An oversized unit may run inefficiently during light loads. An undersized unit can overheat or shut down.
Tip 1: Add the running wattage of every appliance.
Tip 2: Include starting surges from pumps, refrigerators, and tools.
Tip 3: Keep continuous demand below about 80% of the inverter’s rated output. A small safety margin matters. For example, a 1,000-watt load suits an inverter near 1,250 watts, not exactly 1,000.
Tip 4: Check conversion efficiency at your usual load, not only the advertised peak.
Tip 5: Prefer a high-efficiency model when batteries supply power daily. Even a few percentage points can reduce losses over many months.
Tip 6: Match the inverter’s input voltage with the battery system. Incorrect voltage creates heat and may damage equipment.
Tip 7: Keep cable runs short and properly sized. Thin cables waste energy as heat, especially under heavy current.
In practical inspections, loose terminals often cause surprising losses. Tight connections help. Ventilation also matters. An inverter placed inside a warm, closed cabinet may reduce its output.
I once underestimated standby consumption during a low-use period. That mistake changed the final energy estimate. Measure actual loads with a meter when possible. Manufacturer figures are useful, but real homes rarely behave perfectly.
Optimize Wiring, Connections, and Installation Conditions
Energy loss often begins before an inverter starts working. Correct wiring and careful installation can protect every unit of power. Choose cables with the right cross-section for the current and distance. Undersized cables create heat and voltage drop. Keep DC and AC cable runs short, direct, and separated where practical. Long loops add resistance. A cool inverter wastes less energy.
Prepare cable ends carefully, then use clean, compatible terminals. Loose connections can produce warmth, noise, and intermittent output. Tighten each terminal to the manufacturer’s specified torque. Do not guess. Protect outdoor joints from rain, dust, and condensation. A weatherproof enclosure helps, but poor sealing still causes trouble. Inspect connectors after the first few weeks, because vibration and temperature changes may loosen them.
Install the inverter in a shaded, dry, and well-ventilated location. Leave clear space around its cooling vents. Avoid placing it beside heat-producing equipment or in direct afternoon sunlight. Check the mounting surface, airflow, cable entry points, and local temperature range before commissioning. Measure voltage at both ends of the cable under load. This reveals losses that visual checks miss. I once focused on cable size and overlooked a slightly loose terminal. The system worked, but the connection ran warmer than expected. That mistake changed my inspection routine. Record readings, revisit them seasonally, and ask a qualified electrician to verify work where required.
7 Tips to Reduce Energy Loss with a Good Inverter
Estimated reduction in system losses through optimized wiring, connections, and installation conditions
The chart presents practical engineering estimates for reducing energy losses in inverter-based systems.
Actual results depend on cable length, conductor size, load profile, ambient temperature, connection quality,
ventilation, and inverter operating efficiency. Use short, correctly sized cables, secure all terminals,
reduce voltage drop, keep equipment cool and clean, avoid shading or overload conditions, select a high-efficiency
inverter, and perform regular inspections.
Control Heat, Ventilation, and Dust Around the Inverter
Heat, poor ventilation, and dust can quietly increase inverter losses. The U.S. Department of Energy recommends keeping power electronics within their rated temperature range, because heat accelerates component aging. In practice, leave clear space around the inverter and avoid mounting it against a sun-heated metal wall. A shaded, ventilated location usually performs better than a tightly enclosed cabinet.
Airflow matters more than many installers expect. Keep vents unobstructed, and check whether nearby equipment releases warm air toward the inverter. The International Energy Agency Photovoltaic Power Systems Programme reports that soiling commonly causes several percent of annual solar-energy losses, depending on climate and site conditions. Dust on cooling vents can also restrict airflow and raise internal temperatures. Wipe external surfaces carefully, but never spray water into openings.
I recommend checking temperatures, alarms, and fan operation during hot afternoons. A handheld infrared thermometer can reveal unusual hot spots, although it cannot replace qualified electrical testing. Clean around construction areas more often. Fine dust travels far. Some systems need less maintenance than expected; others need much more. That depends on wind, pollen, insects, and enclosure design. Fraunhofer ISE’s Photovoltaics Report shows modern inverter efficiencies can approach 98–99%, but those figures come from controlled conditions. Real performance may fall when heat and dirt are ignored. A small ventilation mistake can become a long-term energy penalty.
Monitor Performance and Maintain the System Regularly
A good inverter can reduce energy loss, but only when its performance stays visible. Check daily output against sunlight conditions, not against a fixed number. A cloudy afternoon should not trigger panic. Sudden drops on clear days deserve attention. Watch efficiency, input voltage, output voltage, temperature, and fault codes through the monitoring interface. Keep weekly readings in a simple log. Patterns often reveal problems before alarms appear.
Maintenance should be practical and consistent. Inspect cooling vents every month, especially in dusty rooms or garages. Remove dust with approved equipment and follow the electrical safety instructions. Loose terminals, damaged cables, and unusual humming require a qualified technician. Do not open energized equipment. That shortcut is not worth the risk. A clean airflow path helps prevent overheating, which can cause wasted power and shorten component life.
Review the system after storms, grid interruptions, or unusual shutdowns. Compare current performance with the installation records and recent weather data. If energy production falls repeatedly, arrange a professional inspection rather than guessing. I have found that many owners check the app often but ignore physical conditions. That is an easy mistake. Monitoring is useful, but it cannot detect every loose connection or blocked vent. Maintenance notes may also be incomplete, so leave space for correction and review them with a trained professional.
Conclusion
How to reduce energy loss with a good inverter begins with understanding where losses occur in solar and power systems. Energy may be wasted during DC-to-AC conversion, through undersized or oversized equipment, poor wiring, loose connections, and unsuitable installation conditions. Selecting an inverter with the right capacity and high conversion efficiency helps ensure that more generated power reaches the intended devices. Properly sized cables, secure connections, and a short, well-planned wiring layout can further reduce resistance and voltage drops.
Heat, dust, and insufficient ventilation can also lower inverter performance and shorten its service life. Install the unit in a clean, shaded, and well-ventilated location, while keeping air passages unobstructed. Regularly monitoring energy production, temperature, efficiency, and warning signals makes it easier to identify problems early. Routine cleaning, inspections, and timely maintenance help the system operate more consistently, reduce avoidable energy loss, and maintain reliable performance over time.

 Sriram Electricals